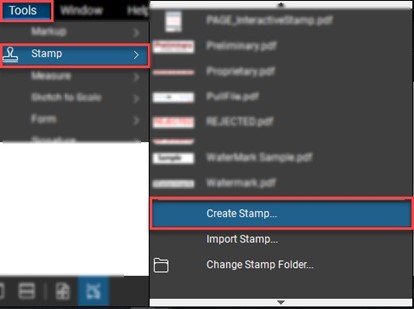
Stamps in Bluebeam® Revu® are located under the Tools menu tab. In this location, you'll see the out-of-the-box stamps included with the purchase of Revu. You can also create your own custom stamps to use for future projects. In the post below, we'll take a look at the two types of stamps in Revu.

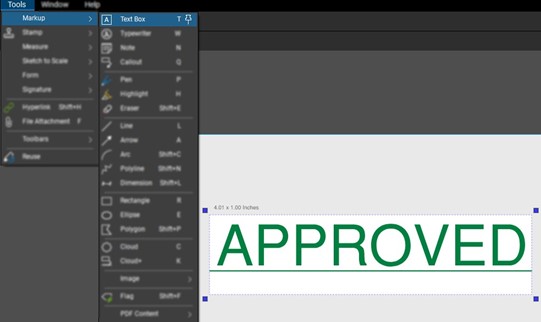
Creating a custom stamp includes taking advantage of the world-class Revu markups. Text markups, pen markups, line-styles, shapes, and images can all be added to a stamp. A static stamp is a stamp that stays consistent regardless of how or when it's placed. In our last "How to with Revu" Q&A webinar, we created a simple stamp by adding a textbox with the word "Accepted" and a line beneath it.
Every time I use this stamp, it will always look like it does below:

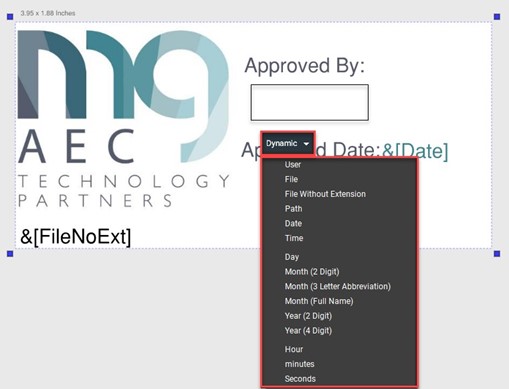
You can create a dynamic stamp using the same process. You can even add the markup tools to create some very elaborate stamps. When creating a dynamic stamp, there is some data you can take advantage of from within your machine.
The options below are for changing how your date and time are displayed.

Once selected, the text &[OPTION]. This indicates the stamp text for this text box will dynamically change depending on how/when the stamp is added.
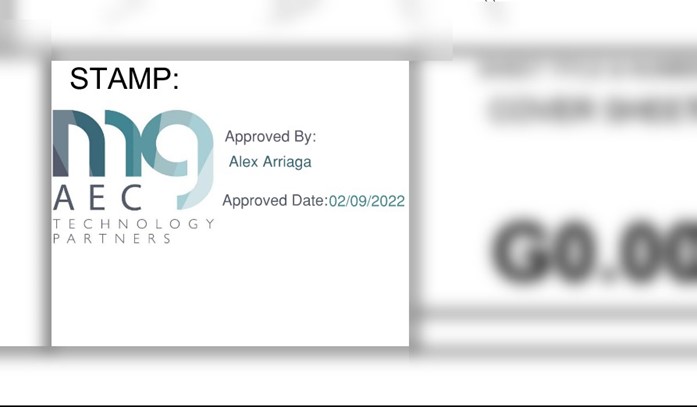
Once the stamp is applied, you can see how the dynamic text boxes "work their magic" by adding both my name and the date I applied the stamp.
Note: Depending on the date, the &[DATE] text applied will dynamically apply the date to match. This is the same for the user name- I can log in to another Windows account, and the &[USER] text will change.

Try Bluebeam Revu today. Download your free, 30-day trial here.

Alex Arriaga is a Bluebeam Design Technology Specialist at MG AEC Technology Partners. Alex is a Bluebeam Certified Instructor, Bluebeam Certified Support Representative and a member of the Denver Bluebeam User Group. He works with organizations and individuals in furthering their workflows with and knowledge of Bluebeam Revu.

Bluebeam Revu is a registered trademark of Bluebeam, Inc., used under license.