
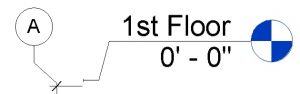
In this Click Saver I want to talk about an old trick that I have used for years that recently a client thought was a new feature in Revit 2014. The feature is called Propagate Extents, what is sad is this tool is not very well known, part of the problem is discovering it. It’s not a regular button that shows on the ribbon as you go through the tabs but only shows when you select a datum such as a grid or a level.
So when would you want to use this command, let’s say you have grids or levels that are close to each other or they overlap each other. So you add an elbow by clicking the little jog symbol and change your view to your liking. Since this is only done in the view where you did it this is where the Propagate Extents tool comes in to save the day! Most of us would like to see those jogs in a lot of the other views and this is where those changes can be pushed into all the other views that you choose.
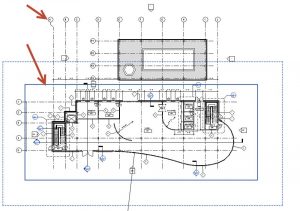
The concept of the command is when you change the grid or level from 3D to 2D you can then propagate those custom 2D changes to other views. But there’s a funky issue with this command, for some reason this functionality breaks when a crop region or scope box is enabled and the datum’s 3D extents goes beyond the scope box or crop region edge. You know this is happening to you when the dialog box will not open at all, no error, nothing. Very confusing when you first stumble on this command and in one view it works but in a different view it doesn’t, did that just ring a bell for some for you, and it did for me. Below is a good example of that happening with a crop region and the dialog box won’t open.
So how do get past this if this is happening to you in a project? Here is the workaround, a little messy if you have a lot of views to work with but at least you can get it to work. First thing is to Disable the Crop Region and Scope Box if you have one in the view that contains the 2D extents you want to propagate, plus any other views you want to propagate.
![]()
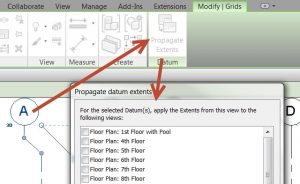
Now select the grids or levels, click the Propagate Extents button on the Ribbon, pick your views and finish the command. Bingo, everything is looking great and you just saved a whole bunch of time! Now re-enable the Crop Region and Scope Box in the affected views and you are good to go.
I hope that this little trick can help everyone speed up getting those jogs displayed in the other views quicker. See you in class, Jarod

