
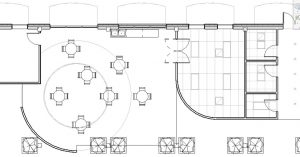
In this click saver I want to talk about showing ceiling information in a plan view. I have been working with quite a lot of interior firms recently that are switching over from AutoCAD/ACA to Revit. Many wanted to see soffits or other items that would normally only show in a RCP view so that they could reference to those edges. One could use Reference Planes for some of this but it quickly falls apart if the edge is curved, plus one might want to print the view for documentation.
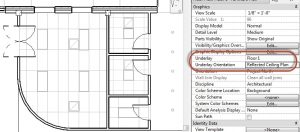
To get started, open a plan view of your choice and look at the View Properties palette. The first thing you will need to change is the “underlay” option- choose the level that you need to look at. In my case, I’m changing it to Floor 1. Notice that the “underlay orientation” is active, now choose “reflected ceiling plan” instead of “plan”.
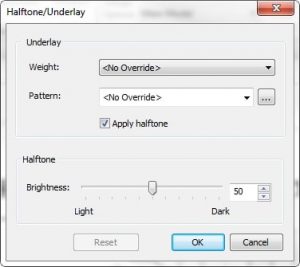
The current display of the underlay can be changed if needed. If you go to the “manage” tab and select the drop-down for “additional settings”, choose “halftone/underlay”. You can choose the line weight, line pattern, and the halftone, just remember that this is going to change it globally throughout the project.
You may not have noticed, but any of the annotation that was in the original reflected ceiling plan does not come through. Of course you can always do a copy/paste if you need the annotation in this view.
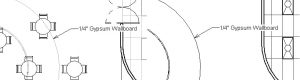
One last thing to take note, one cannot “tab” to an object in the underlay and use the “graphics override in view”. You can use the “linework” tool to make an object display different. This can be found on the “modify” tab, just make sure to change the “line style” to something other than “by category”. If you don’t then the tool will not find any geometry to select. You can also use the “annotate” tab use the “detail line” tool to enhance the edges from the underlay. By using the “pick lines” tool you can pick on the existing edge(s) to trace them, just make sure to change the “line style” to what you need. By using the “pick lines” tool you will notice that the “lock” option is available so if the edge changes in the RCP view it also change in this view.
![]()
I’m not a huge fan when it comes to using the “lock” option but this might be a place where you would need to use it so everything stays coordinated.
Hope this helps, see you in class or at your office, Jarod

