
Spaces are designed to enable more efficient punch list and back check operations. Set up your drawing with spaces before punching, and you'll find it easier to find, sort, and report your punch markups. Spaces help organize our markups by location. Spaces are created by utilizing third-party plugins within Revu®.
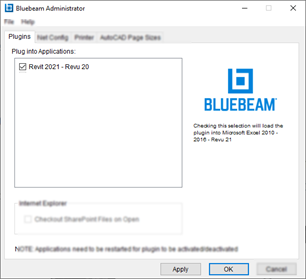
The first step in creating spaces is to confirm the Revit plugin is enabled. This will ensure we have access to the Revu plugin. Open the Bluebeam Administrator to view plugin access.
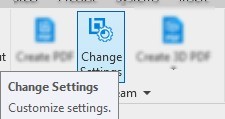
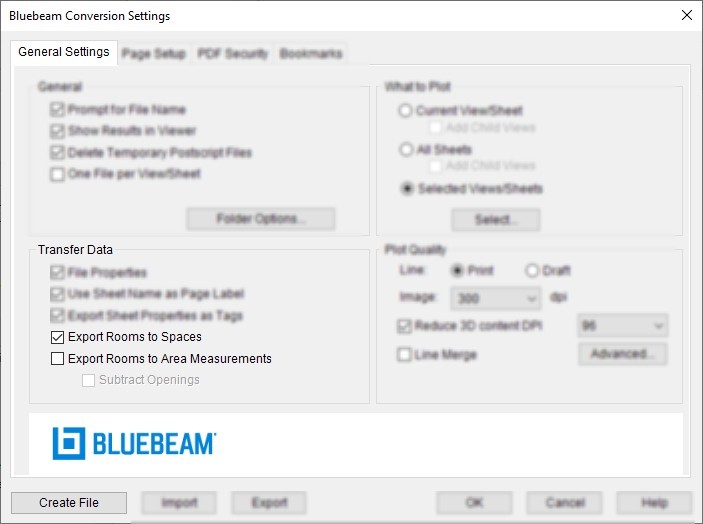
Once in Revit, open the add-ins tab to access our newly enabled Bluebeam plugin. From here, we must ensure the "Export Rooms to Spaces" option is selected. This will ensure that any room created in Revit will be automatically converted into a "Space" in Revu. Once enabled, we can select the "Create File" option to create the PDF with our newly created spaces.
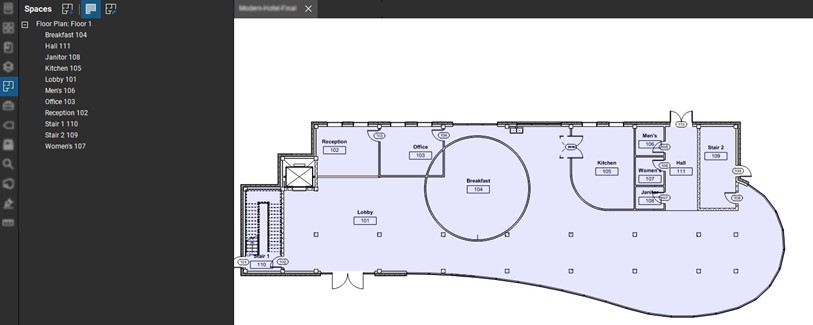
Now that the file has been converted to PDF format, we can see the rooms have automatically converted into Spaces. Each space has a blue tint representing the room location. Any markup placed in a space can be sorted in the markups-list for future reporting.
This blog post reviews information covered in our Team D3 monthly How to with Revu Q&A webinar sessions. Check out our upcoming events to join these webinars live.

Alex Arriaga is a Bluebeam Design Technology Specialist at MG AEC Technology Partners. Alex is a Bluebeam Certified Instructor, Bluebeam Certified Support Representative, and a member of the Denver Bluebeam User Group. He works with organizations and individuals in furthering their workflows with and knowledge of Bluebeam Revu.
![]()
Bluebeam Revu is a registered trademark of Bluebeam, Inc., used under license.

