
Toolbars in Revu® give you quick access to your most commonly used tools and commands. We'll explore how you can group common tools together, customize default toolbars, and create your own toolbars.
Let's dive in!
![]()
![]()
Toolbars can be located on any side of the profile: top, bottom, left, or right. The string of dots preceding or following the toolbar allows us to move it to any of these locations.
Note: If the string of dots is missing, you may have your toolbars locked in place.
Turn toolbars on or off by navigating to the Tools menu bar > Toolbars. Toolbars that are turned on have a checkmark next to their name.
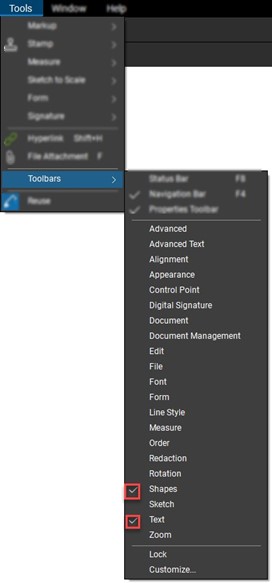
Above, we see the Shapes & Text toolbars turned on. Select the Customize option on the bottom to begin customizing and creating our toolbars.
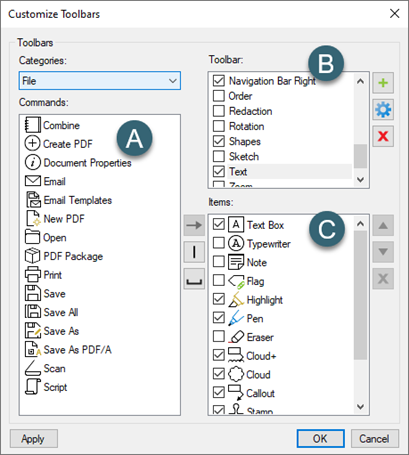
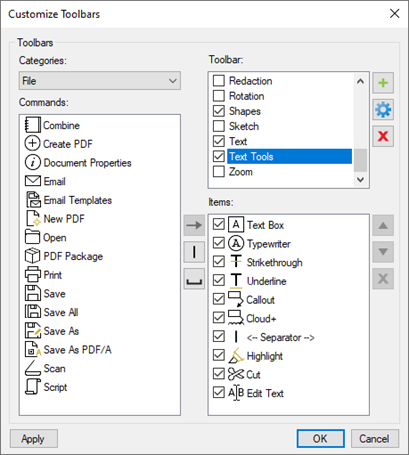
After selecting Customize, the Customize Toolbars window will display. From here, we have a few sections.
A) This location shows the command listed under the above category. In this example, we see all the File commands.
B) Here, we see all of our toolbars available to turn on or off. The + icon allows us to create our own. The X icon deletes a toolbar, the ⚙ icon lets us change the name.
C) This is a list of the current commands in the selected toolbar in section B.
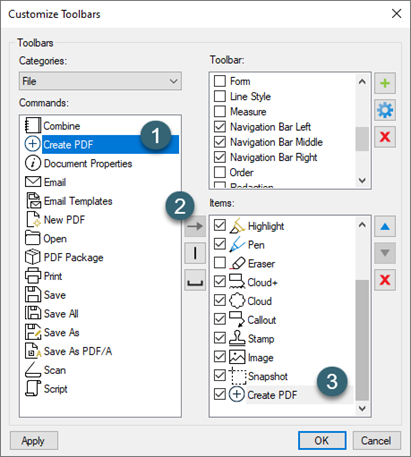
To add a command to an existing toolbar:
 Select the + icon to create a new custom toolbar and give the toolbar a name.
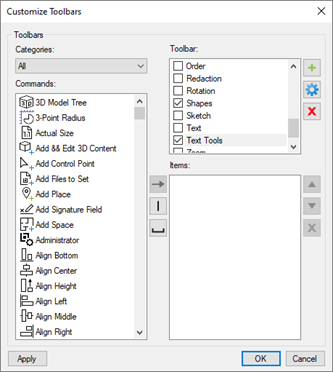
Once we have our toolbar names, above, we can see our Items list is currently emptys. At this point, we can begin moving commands over into our new toolbar. We can add separators and blank spaces to split tools as well.
We now see our toolbar created with each command listed in the order it's arranged. Notice the separator splitting the toolbar into two different sections. We can have large or small toolbars with multiple blank spaces and separators to create a one-stop-shop for tools.

Large Custom Toolbar

Small Custom Toolbar

Alex Arriaga is a Bluebeam Design Technology Specialist at MG AEC Technology Partners. Alex is a Bluebeam Certified Instructor, Bluebeam Certified Support Representative and a member of the Denver Bluebeam User Group. He works with organizations and individuals in furthering their workflows with and knowledge of Bluebeam Revu.
![]()
Bluebeam, Revu, and Studio are registered trademarks of Bluebeam, Inc., used under license.

