
In this Click Savers I want to discuss the additional roof tools that might be easily missed at times. Recently I was working with a client that wanted to create a unique roof similar to what I call a butterfly roof, see below.
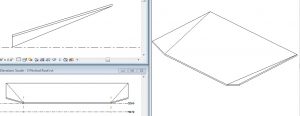
Here is another example gone to the extreme using this method in Revit.

There are some different ways to accomplish this type of roof design in Revit. This is just one method that might work for you, the one thing I do want to mention about this method is the thickness of the roof type. Depending on how much the roof gets warped you might get an error about Revit having to change the thickness of the roof to accomplish the slope. With that said, when using Roof by Footprint (3) or more times to create these types of roofs, this process can be a time consuming, plus trying to match the edges to each other can be troublesome. You could even try using a Slope Arrow for these conditions but again it could be time consuming and littered with even more errors.

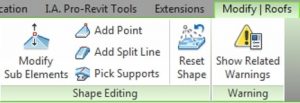
So first create one large “flat” Roof by Footprint with no slopes defined and then using the Shape Editing tools along with the Spot Slope annotation tool. I also use some Reference Planes to help get the valleys or ridges located correctly. You must select the flat roof first, then and only then do these tools show themselves.
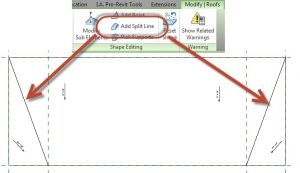
With the flat roof selected pick on the Add Split Line tool and use object snaps to select the endpoints of where the valley edge needs to be located. So in this case I used the top corners and bottom intersections where the reference planes intersect the roof edge.
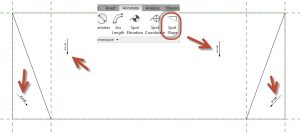
The current limitation of this process is the slope is always controlled by a height. But don’t fret, go to the Annotation tab and select the Spot Slope tool and tag each sloped face with this tag. Now as you change the height you can see what the slope is doing.
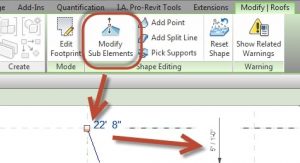
Now select the roof again and use the Modify Sub Element tool. Select one of the square grips and the height value will show. Change the height to what you think it needs to be and notice how the Spot Slope tag updates to show you what the slope comes out to. Do take note that this icon for this tool is deceiving, it represents selecting a point, and I have learned that it will also work on the Split Lines and the edges of the roof.
Just one of many ways of doing this type of roof in Revit. See you in class or at your office, Jarod

