In our Bluebeam Punch Process Workshop, a 4-part webinar series, we took a look at the punch process workflow capabilities in Bluebeam Revu. In this post, we'll summarize and review each session.
Profiles allow users to easily store & access their most used toolbars, menus, & other display settings. These created profiles manage the toolsets, toolbars, panels, and markup columns displayed in our interface. In this session, we made a custom profile and saw how different page sizes determine how we navigate in Revu.
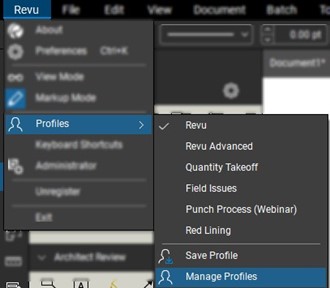
To do this, begin by navigating to the Revu menu tab and selecting Profiles > Manage Profiles. ![]()
A new window will display to select the Add option to create a new profile.
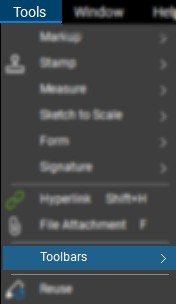
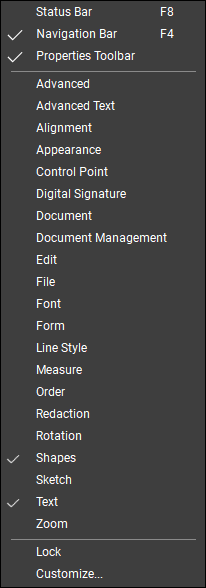
The first main feature we changed in a Profile is the displayed toolbars. We also changed the location of toolbars for ease of access.
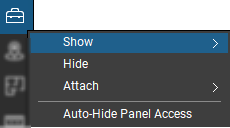
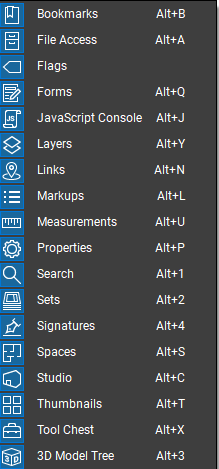
The second main feature we can change in a Profile is the displayed toolbars. We can also change the location of toolbars for ease of access.
Spaces enable more efficient sorting and backcheck operations, which go hand-in-hand with the punch process. In this session, we viewed the third-party add-ins for Revu. We also created a new drawing with exported spaces to complete our punch process.
In this session, we worked with a third-party application to create a PDF using Revu's add-in.
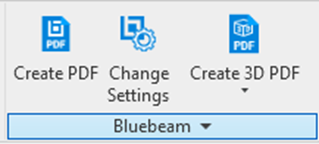
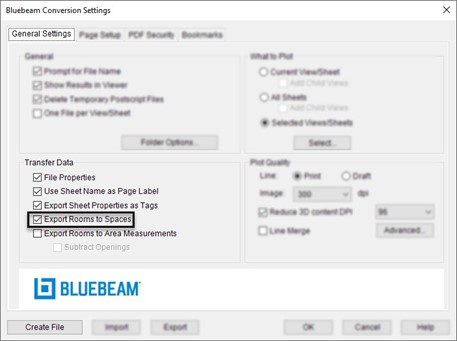
Before creating the PDF file, select the "Change Settings" option. From here, selecting the Export Rooms as Spaces option is crucial. This action generates our PDF with spaces already created.
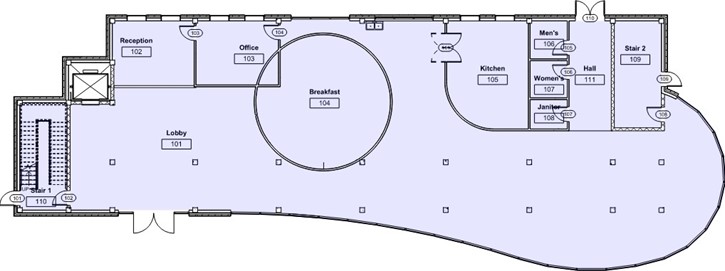
Example File: The blue highlight represents a space on our drawing.
Standardized tools in Revu are required to form proper workflows. Your organization must have standards to ensure users use the correct tool in every scenario. In this session, we created custom toolsets specifically for our punch process workflow. Toolsets are a great way to manage and reuse standard tools on any previous, current, or future project.
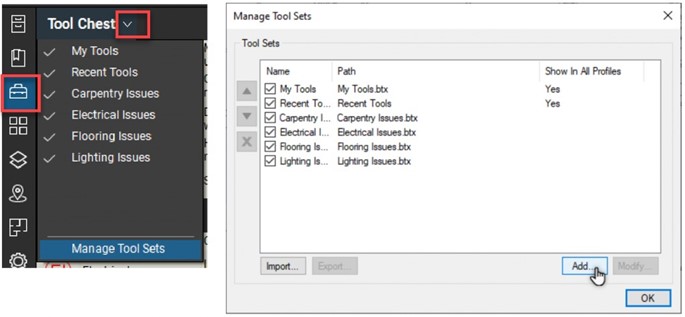
Start by selecting the toolset panel > "Tool Chest" dropdown > "Manage Tool Sets." Once you have clicked "Manage Tool Sets," a pop-up window will display your current tool sets with the option to "Add…" another. Give the toolset a name, and it will appear in your Toolchest ready to be populated with custom tools.
Let's start by applying the "Ellipse" markup to establish the base of our custom one. Next, we'll apply a "Text Box" onto the same page. This action will allow us to change the abbreviation for our field issue.


Once each part has the proper comments and subject, we can group them together to form one markup. Be sure to note the order in which a markup is grouped.

If done correctly, the comment of the ellipse will be carried over to the grouped markup (as it was the item that was first selected during the previous step).
When the new markup is complete, right-click it and select "Add to Tool Chest" from the menu options. From there, pick the desired tool chest (in this example, it's our newly created paint issues set). We will then see our touch-up painting issue listed in our tool set.
Studio Session is an excellent tool for collaborators to work on files together, regardless of location. Upload any PDF and invite users to collaborate immediately. In this session, we shared the custom file and toolset created directly on the PDF. Once in the Studio Session, we saw how users collaborate.

First, begin by selecting the Studio Panel. A window will display to log in or create a studio account. Once logged in, select the plus icon (+) to create a "New Session."
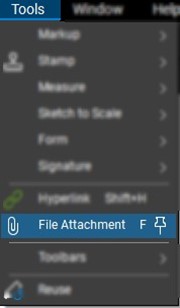
Once the Studio Session is created, we can invite folks to collaborate. Under the Tools menu bar, you can select the file attachment option to embed the custom profile and tools to our users.
Try Bluebeam Revu today. Download your free, 30-day trial here.

Alex Arriaga is a Bluebeam Design Technology Specialist at MG AEC Technology Partners. Alex is a Bluebeam Certified Instructor, Bluebeam Certified Support Representative and a member of the Denver Bluebeam User Group. He works with organizations and individuals in furthering their workflows with and knowledge of Bluebeam Revu.

Bluebeam Revu is a registered trademark of Bluebeam, Inc., used under license.