
Bluebeam Cloud is a subscription-based mobile solution accessible through app or browser devices. It enables users to access drawings, markups, RFIs, and submittals while on the go. With this mobile solution, users no longer require a desktop device to access tools/features.
To gain access to Bluebeam Cloud, users must be assigned to a seat of Revu21 in the Subscription Management Portal.
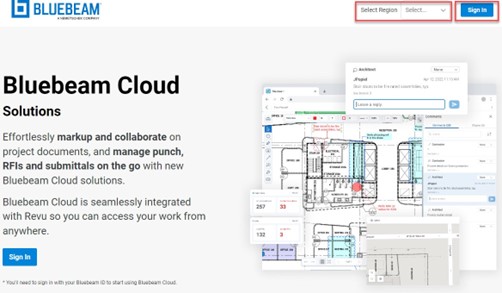
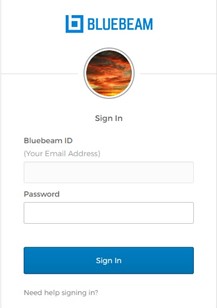
To access the Bluebeam Cloud application, start by navigating to app.bluebeam.com. Remember, this can be accessed through any device with an internet connection. Select the US (North American Servers) region and sign into your account.
Immediately after logging in, you can choose between "My Workspace" or "Projects."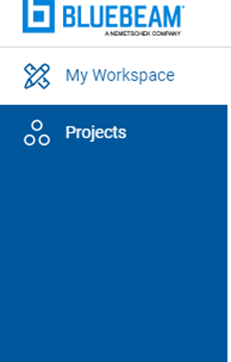 My Workspace: This location is meant for personal use. Use this location to store, view, and markup files of your own. Only you have the ability to see the files in your "My Workspace"
Projects: This location is meant for collaborating with others. You can upload, store, view, and markup files together in this location. Any Project you create or are invited to will be listed.
The Dashboard tab gives an overview of the selected Project.
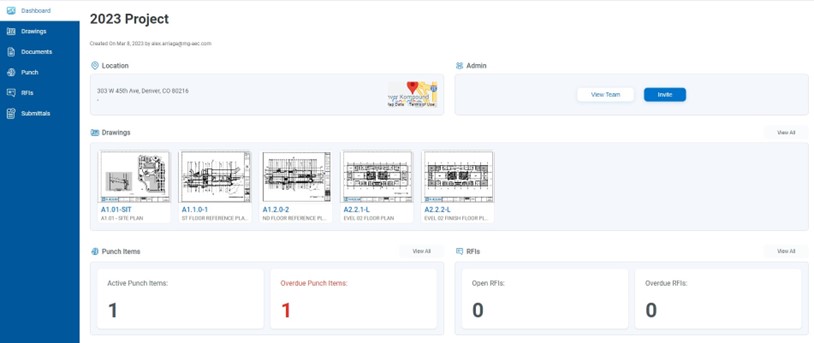
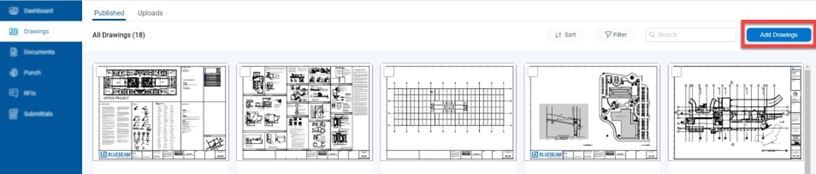
The Drawing tab is a location to share documents across teams. Select "Add Drawings" in the tab to publish the files you want to collaborate. Then, you can view, markup, manage RFI's, and Punch items.

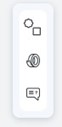
A) You can upload custom tools to use in the Bluebeam Cloud application. Note: Not all markups are currently supported.
B) These are the out-of-the-box markups that users have access to in Bluebeam Cloud.
C) This location allows us to manage RFI's in the Project.
D) This location allows us to place punch items on the plan.
 At the far right, there is another toolbar. The first icon is essentially the Markups List, now located on the right side of the user interface. Below that is each icon for managing Punch items and RFI's.
The Documents tab is a location to store and markup files. Note: In this location, users cannot access the RFI and Punch tools.


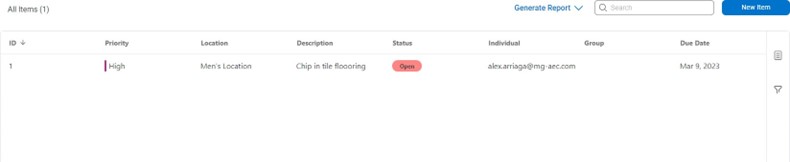
You can place a Punch item by navigating to the Drawings tab and opening a file. Once you place the punch item, a window displays for the user to enter the pertinent information.
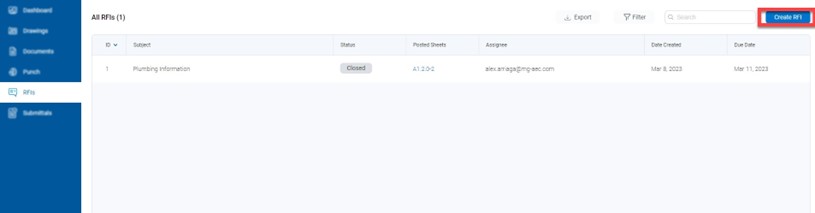
Once in the file, you can track and manage the RFIs added to a Project. Once an RFI is closed, you can mark the RFI location in the document.
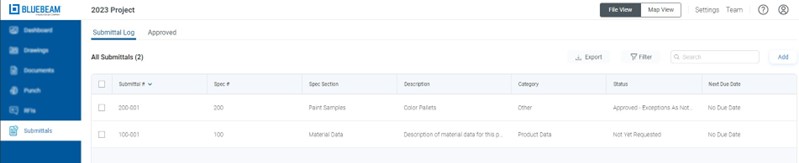
From the Submittals tab, you can create and assign submittals. Upload a template, log, set status, and export submittals.
Sign up for our next monthly How to with Revu session, where Alex demonstrates a helpful tip for being successful with Bluebeam solutions and then answers all your Revu-related questions.
Try Bluebeam Complete today. Download your free, 30-day trial here.

Alex Arriaga is a Bluebeam Design Technology Specialist at MG AECO Technology Partners. Alex is a Bluebeam Certified Instructor, Bluebeam Certified Support Representative and a member of the Denver Bluebeam User Group. He works with organizations and individuals in furthering their workflows with and knowledge of Bluebeam Revu.
![]()
Bluebeam Revu is a registered trademark of Bluebeam, Inc., used under license.

